
Patio Paver Installation
Creating a beautiful, functional outdoor space starts with the right patio paver installation. Whether you want a cozy backyard seating area, an elegant entertaining space, or a durable walkway, properly installed pavers can transform your property instantly. This guide dives deep into the step-by-step process, material choices, expert tips, and comparisons to help you achieve a long-lasting, aesthetically pleasing patio that enhances your home’s value and outdoor lifestyle.
Why Patio Paver Installation Matters
A well-installed patio is more than just a surface for furniture it’s a long-term investment in your home. Proper patio paver installation ensures:
-
Durability: Correct installation prevents shifting, cracking, or sinking over time.
-
Drainage: Proper base and slope prevent water pooling and erosion.
-
Aesthetic appeal: Even patterns, color choices, and edging add elegance.
-
Low maintenance: Well-installed pavers require minimal upkeep, saving time and money.
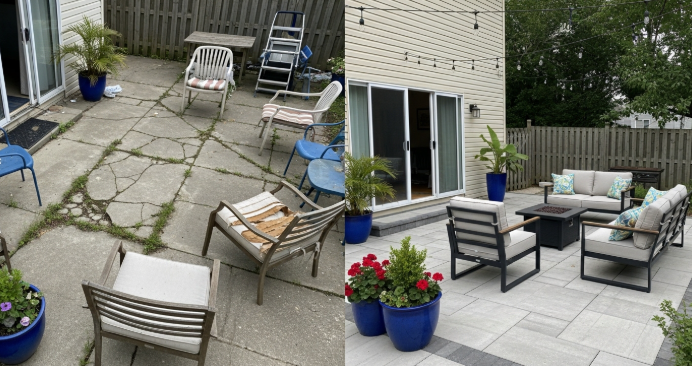
Real-life example: A homeowner in New Jersey replaced an uneven concrete slab with interlocking pavers. With proper installation, the patio remained stable and visually stunning for over 10 years, supporting heavy furniture and outdoor cooking equipment without issues.
Guide to Patio Paver Installation
Installing patio pavers may seem daunting, but with the right steps, it’s manageable even for DIY enthusiasts.
Step 1 – Planning Your Patio Layout
Before any digging or material purchase:
-
Measure your area precisely.
-
Decide the shape and design: square, rectangle, circular, or freeform.
-
Select a paver pattern: herringbone, basket weave, running bond, or random.
Pro tip: For small patios (10x10 ft), interlocking patterns like herringbone provide extra stability and prevent shifting under foot traffic.
Step 2 – Choosing the Right Pavers
Your patio’s longevity depends heavily on the pavers:
-
Concrete Pavers: Durable, versatile, and cost-effective.
-
Clay Bricks: Traditional look, very strong, slightly more expensive.
-
Natural Stone: High-end aesthetics, excellent durability, pricier.
-
Permeable Pavers: Allow water to drain through, ideal for heavy rainfall areas.
Consider thickness: For standard patios, 2–3 inches is sufficient. For areas with heavy furniture or vehicle traffic, use thicker pavers for added strength.
Step 3 – Preparing the Base
Proper base preparation is crucial for stability:
-
Excavate soil to a depth of 6–8 inches (or deeper for heavy loads).
-
Compact the soil using a hand tamper or plate compactor.
-
Lay a geotextile or landscape fabric to prevent weeds.
-
Add a 4–6 inch layer of crushed stone or gravel.
-
Level and compact the gravel for a firm, even foundation.
Expert tip: Ensure a slope of 1/8 inch per foot away from your house for proper water drainage.
Step 4 – Laying the Pavers
-
Start from one corner or a straight edge.
-
Lay pavers in the chosen pattern.
-
Maintain consistent gaps (usually 1/8–1/4 inch).
-
Use a rubber mallet to set each paver firmly in place.
Example: Alternating colored pavers can create striking visual patterns while hiding minor misalignments.
Step 5 – Filling the Joints
-
Spread sand (or polymeric sand) over the surface.
-
Sweep the sand into all gaps.
-
Lightly water the area to lock the sand in place.
-
Repeat as necessary to ensure all joints are filled.
This step stabilizes the pavers, reduces movement, and prevents weed growth.
Step 6 – Installing Edge Restraints
-
Edge restraints prevent pavers from shifting outward over time.
-
Use plastic, metal, or concrete edging secured with spikes or stakes.
-
Place the edging slightly above the sand layer for a neat finish.
Real-life tip: A California homeowner’s patio retained perfect alignment for 8 years, thanks to properly installed metal edge restraints.
Step 7 – Maintenance Tips
-
Sweep regularly to remove debris.
-
Refill joints with sand as needed.
-
Check for loose or uneven pavers and adjust.
-
Pressure wash occasionally for a fresh appearance.
With these simple maintenance steps, a patio paver installation can remain attractive and functional for decades.
Patio Paver Types
| Paver Type | Pros | Cons | Best Use Case |
|---|---|---|---|
| Concrete | Affordable, versatile, durable | Can stain or chip | Standard residential patios |
| Clay Brick | Classic look, strong | Expensive, color may fade | Traditional or rustic patios |
| Natural Stone | High-end look, very durable | Expensive, heavy | Luxury patios or poolside areas |
| Permeable Pavers | Eco-friendly, allows water drainage | Needs stable base | Rain-prone areas, sustainable design |
Frequently Asked Questions (FAQs)
1. What is the cost of patio paver installation?
The cost depends on paver type, patio size, and site preparation. On average, expect Rs. 2,500–5,000 per square foot, including labor and materials.
2. Can I do patio paver installation myself?
Yes, small patios can be DIY projects if you have the right tools and follow proper steps. Professional installation is recommended for large patios or uneven terrain.
3. How long does a patio paver installation last?
With proper base preparation and maintenance, patios can last 20–30 years. Heavy traffic areas may require occasional re-leveling.
4. Do patio pavers require sealing?
Sealing is optional but recommended for concrete and natural stone pavers. It enhances color, prevents stains, and prolongs durability.
5. Can patio pavers be installed on slopes?
Yes, but a proper base, slope, and edge restraints are critical to prevent sliding and water pooling.
6. How do I choose the right pavers for my home?
Consider load, aesthetics, climate, and budget. Concrete is cost-effective; natural stone is high-end; permeable pavers are ideal for drainage.
7. How do I maintain my patio after installation?
Sweep, refill joints with sand, remove weeds, and occasionally pressure wash. Proper maintenance ensures long-lasting beauty.
Final Thoughts on Patio Paver Installation
Patio paver installation is a powerful way to enhance your home’s outdoor space. With careful planning, the right materials, and proper technique, your patio can be both beautiful and durable for decades.
Key takeaways:
-
Choose the right paver type and thickness for your climate and use.
-
Prepare a solid base with proper slope for drainage.
-
Install pavers carefully and fill joints completely.
-
Edge restraints and regular maintenance dramatically extend lifespan.
Real-life inspiration: From compact urban backyards to sprawling garden spaces, homeowners who invest in professional or carefully executed DIY patio paver installation enjoy durable, attractive patios that increase property value and outdoor enjoyment.
Start planning today measure your space, choose your design, and enjoy a patio that will transform your outdoor living for years to come.